On This Day in History – June 22, 1940, the First Dairy Queen Opens Up

On this day in history, the very first Dairy Queen store opened in Joliet, Illinois.  Dairy Queen was first introduced to customers (before they were called Dairy Queen) back in 1938 where a father and son (John & Alex McCullough) who owned a mix plant business in Green River, Illinois had been experimenting with a soft serve dairy product.  In August of 1938, they had a $.10 sample sale of this new soft serve product at their friend, Sherb Noble’s walk in ice cream shop.  Within two hours, Noble dished out over 1,600 servings of this new ice cream treat.  Since this new ice cream was such a hit, John and Alex decided to name it the “dairy queen”.

The original Dairy Queen is still located at 501 N Chicago Street in Joliet, Illinois, but it is no longer operational.  Today, the largest Dairy Queen franchise is located in Texas.  Dairy Queen has over 5,600 stores worldwide.

Dairy Queen become one of the first pioneers for franchised food stores with 10 stores in 1941, expanding to 100 stores by 1947 and 1,446 stores by 1950 with another increase to 2,600 stores by 1955.

Diary Queen has always been well known for holding parties (especially with their delicious ice cream cakes), the place where sports teams go to cool off after a winning game, Corporate functions have been held (mainly in Texas) and all around family nights.  Their motto is – Satisfied customers lead to successful restaurants.

Since the economy has taken a slight downturn in 2008 and 2009, several Dairy Queen stores have gone out of business, but Texas still holds the highest spot for most Dairy Queens in the United States.


BBQ Chicken Salad - Summertime Favorite

One of my favorite things to eat in the summer time is salad, because it is so refreshing.  Here is one of my favorite salads – the BBQ Chicken Salad. This salad is super easy to make, the hardest thing is grilling the chicken (and even that only takes about 5 minutes). I recommend eating this out on a picnic table in your back yard.  Enjoy!

What you will need (This makes 1 entrée serving or 2 side salads):

2 Cups chopped romaine lettuce

2 Cups chopped green leaf lettuce or spinach

1/2 Cup chopped red cabbage

1 Small tomato, chopped (1/4 Cup)

1 Boneless, skinless chicken breast half

1/3 Cup barbecue sauce

1/2 Cup black beans

1/4 Cup whole kernel corn

1/2 Cup shredded cheddar cheese

1/4 Cup French’s French Fried Onions (*onion straws)

3 Avocado slices (1/4 avocado)

1/4 Cup ranch dressing

Toss together the lettuce and cabbage and arrange on a large plate (or two small plates).  Arrange the tomato on the lettuce mixture at the bottom of the plate(s). 

Grill the chicken breast on a hot barbecue grill for 4 to 5 minutes on each side or until done, making sure to brush a generous amount of barbecue sauce over the chicken as it grills.

Heat the black beans and corn in a small sauce pan over medium heat.  Spread the black beans and corn over the lettuce on the left side of the plate. 

Slice the warm chicken into bite-size pieces and arrange them in the middle of the lettuce in the center of the plate(s).

Sprinkle the cheese over the lettuce on the right side of the plate.  Sprinkle the onion straws over the cheese.

Garnish the salad with 3 slices of the avocado arranged side by side on the right rim of the plate. 

Serve with ranch dressing and the remaining barbecue sauce on the side.

*If you would like to make your own onion straws, here is an easy simple recipe:

What you will need:

2 Cups vegetable oil

1/4 Cup very thinly sliced white onion

1/2 Cup all-purpose flour

1/2 tsp baking soda

1/4 tsp salt

2/3 Cup cold water

Heat the oil in a wide saucepan to about 350°F degrees.

Slice the onion into very thin onion rings and then cut the rings in half, making them into long strips or straws (try to slice the onion as thin as possible).

Combine your flour, baking soda and salt in a large mixing bowl.  Add the cold water and whisk until the batter is smooth. 

Once the oil is hot, drop the onions into the batter.  Remove the onions one at a time, removing any excess batter, and then carefully place them into your hot oil.  Cook each onion straw for about 2 minutes or until they start to turn a golden brown.  Drain the onion straws on a paper towel.  Let them cool for 5 minutes and then add them to your salad.


-Thanks to Todd Wilbur for this recipe

Frozen Fruit Snacks for Summer

Frozen fresh fruit for snacking is so easy, so healthy, and so perfect for

summer that it's frequently overlooked. When you want something sweet and cool and refreshing frozen fresh fruit is quick, simple, and extraordinary lovely. It's disgustingly healthy, too, and requires no real skill. All you need is a freezer, zip-closing 1 quart freezer bags, and fresh fruit. Get the freshest ripe and ready to eat fruit you can; bananas, grapes, blackberries, blueberries, and raspberries are absolutely perfect for this. Strawberries don't really work well frozen whole for eating "as is."

In the case of bananas, buy the best looking bananas you can, and when they're a fabulous golden ripe yellow, without brown spots, put the entire banana, peel and all, in the freezer. That's it. When you're ready to eat one, remove the banana, peel and eat it as you ordinarily would, while it's frozen. It's cold and creamy and quite delicious. I'm fond of slicing the peeled frozen banana and eating with a mixture of other frozen fruit, or with a dish of ice cream.

With berries and grapes, you rinse them, pick out any damaged berries or bits of stem and leaves (remove the grapes from the cluster), make sure they've dried, then pop them into quart size "zip" style freezer bags. When you're ready to eat, pull out a handful of fruit and mix it with other frozen fruit, or eat as is, or drop a handful of frozen berries over your ice cream or yogurt. Quite honestly, just handful of frozen grapes or berries eaten as is is a fabulous summer snack food, while you write.

Thai River Restaurant in Seattle

The city of Seattle has no shortage of Asian cuisine. Practically every corner has a quick teriyaki shop and there are countless pho restaurants scattered around the city. There are also a number of Thai spots in town, from small local chains to mom-and-pop outfits. As easy as it is to find Thai in Seattle, it's important to find a favorite. There's nothing quite like the comfort of coming to an old standby with consistently good food and a comfortable atmosphere. For me and for plenty of other Seattleites, Thai River is that place.

Located in Seattle's north side neighborhood of Greenwood, Thai River is a small, humble restaurant with a menu of classic dishes done right. Their entrees can be served individually or family-style and their portions are generous, but not overwhelming.

For a starter, I recommend the Fresh Rolls. They come as four large tapioca wraps packed with fried tofu, fresh herbs and vegetables. Served with a side of Thai River's amazing peanut sauce, the Fresh Rolls are an excellent beginning for a summer meal. They're essentially a salad course, light vegetables that are substantial but not too filling. Especially as we approach the hot Summer months, it's best to start out with something cool and crisp.

For soup fans, you must try Thai River's Tom Kha Gai. It's a bit more involved than most I've seen, with tomato and strong citrus undertones.

For me, as with a lot of casual Thai enthusiasts, the litmus test for a restaurant is its Phad Thai. The saying goes that there are as many recipes for Phad Thai as there are people who cook it. Even if that's not the case, this most popular of Thai dishes often shows how capable your serving kitchen is. Thai River's Phad Thai is dark and sweet, mostly avoiding that "pickled" flavor that tends to creep into lesser versions of the dish. The heat control at Thai River is intuitive, which offers a crucial element of customization to their Phad Thai. In short, two stars tastes like two stars for the Northwestern regional palate.

The real draw of Thai River are its curry dishes. The Gang Gai red curry chicken is simple but stellar. None of the notes are too strong, from the sweet coconut milk to the spicy curry and the aromatic basil. For patrons in the mood for something slightly fancier, definitely go for the Duck Curry. The flavor combination is out of this world, especially the splash of pineapple.

Thai River has a number of standard dessert options. The Black Rice Pudding is a unique delicacy, though the coconut, green tea or mango ice cream are also excellent routes in the hot months. They also offer a Sweet Sticky Rice with Mango upon seasonal availability.

Of all of Seattle's cosmopolitan, Pacific-influenced dining options, little hole-in-the-wall restaurants like Thai River win out on sheer food quality. Often when you go to upscale Thai restaurants, you're paying for the atmosphere. The heart of good Thai, like all ethnic food (or maybe all food in general) is fresh ingredients cooked properly. That's what you'll get at Thai River.

Charles Shaw "Two Buck Chuck"

After reading about Charles Shaw in terms of writing about "Working Class Wine," I decided to actually try some. As a hungry blogger who likes to drink wine, but has a limited budget, it's my duty to check out "budget wines." If you're not familiar with Charles Shaw wines, they're sold exclusively through Trader Joe's, and were dubbed "Two Buck Chuck" because in California they sell for $1.99 a bottle. Responding to a less than fulsome May 18 article by New Yorker staff writer Dana Goodyear, Charles Shaw founder Fred Franzia complains that "She doesn't understand that somebody can enjoy a $2 bottle of wine," he said.

Hungry blogger that I am, I very much do understand that someone can enjoy an inexpensive bottle of wine. In part because of that article, I decided to give "Two Buck Chuck" a try. My local Trader Joe's carries the complete suite, Chardonnay, White Zinfandel, Merlot, Cabernet Sauvignon, and Shiraz. They're priced at $3.49 a bottle in Washington. Trader Joe's had a wall of cases stacked next to shelves with rank upon rank of bottles against the wall of the store; it's a similar display to that in every Trader Joe's I've ever seen, and yes, people really do buy Charles Shaw wines by the case. The wines come in the standard varietals; I picked a white (ok, a blush) and two reds to try.

White Zinfandel

Lighter in color than I'd expect from Zinfandel, and much much sweeter. Honestly, I'd have to describe this wine as plonk with an 11% ABV. I suppose one might use this Zinfandel in a wine spritzer, but it's not really drinkable. I suspect that the grapes were picked much too ripe. This is my first experience regarding a wine that gets worse with time; half an hour after opening, I tried a second glass, and it was even less palatable. Honestly, this is really pretty horrible.

Shiraz

Better than the Zinfandel, but not by much. Again, mostly it's sweet fruit juice with alcohol burn (it's 12.5% ABV). I'm not sure it's really Shiraz; maybe a Shiraz-Merlot? The bottle is less than explanatory. And it's not any better with the second glass; if this had been my first exposure to Shiraz, there would never have been a second.

Cabernet Sauvignon

Slightly vinegary aroma. Definitely a Cabernet Sauvignon but a decidedly noticeable high alcohol taste, with an odd burnt-toast finish. If this were my first Cabernet Sauvignon, I wouldn't try another. It's 12.5 ABV, and honestly, I suspect they waited way too long to harvest the grapes. We donated the bottle to the cthonic realms.

Part of the popularity of Charles Shaw wines is that Trader Joe's appeals to a very particular middle-class foodie niche. People who are interested in wine, and food, and don't have unlimited funds. They also tend to assume that good wine comes in glass bottles; boxed wine is for their parents' generation. Charles Shaw wines are in bottles, and have a cork; the popular perception is that "real" wine has a cork and a glass bottle, and is therefore automatically "better" than boxed wine. I don't, by the way, share that perception at all, but it is a very common assumption. I note that for the price per bottle of Charles Shaw I pay in Washington, about $3.50, I can buy better wine with a bit of shopping around, and not a lot more money. There's Australian Boonaroo, at under $4.00, there's California Sutter Home White Zinfandel at about $3.50 a bottle, and quite frankly, I'd rather buy local Washington wines and pay $5.00 for Columbia Crest Gewürtztraminer, or $6,00 to 8.00 for Washington Cabernet Sauvignon, or one of the Snoqualmie wines for around six or seven dollars. These are drinkable wines which, frankly, the Charles Shaw wines weren't, so I'd argue that I wasted money buying Charles Shaw at all.

Easy Summer Fruit Freezer Jam

I love the fresh fruit of summer. This summer's locally grown fruit is just starting to appear at local farmers' markets. Right now, it's mostly locally Washington grown cherries and strawberries, but soon, peaches, and then the many sorts of berries Washington grows in abundance. I'll put lot of the berries and freezer bags and freeze them, but I'm also a fan of freezer jam. Unlike conventional heat-processed jam, freezer jam is cooked just enough to melt the sugar and activate the powdered pectin, which "jells" the fruit and juice, but then you put it in containers and keep it in the freezer until you're ready to eat it. It keeps about a year in the freezer, and about three weeks in the fridge, if you can wait that long to eat it. I mostly use it as a fruit topping or filling, instead of on toast, but my toast-eating peers tell me my freezer jam is great that way too.

The following recipe is pretty easy to adapt to other fruits besides strawberries, but strawberries are the easiest fruit to use, and right now, they're easy to find in Washington, Oregon and California. The recipe makes roughly six cups; this is not a recipe to reduce or increase. It works much much better if you make small batches. I like to use those plastic containers designed for the freezer rather than glass jars; they stack well, for one thing. This jam is lovely on scones, or toast, but I mostly like to use it as an ice cream topping, or as filling for a summer tart, or to use in cooking in the winter when I long for the tastes of summer.

Strawberry Freezer Jam

  • 2 cups chopped or crushed fresh strawberries
  • 4 cups sugar
  • 1 package of pectin (1 3/4 ounce)
  • 3/4 cup water
  1. You don't want to completely pulverize the strawberries, but you do want to have pieces that fall somewhere in the range of the size of a kernel of corn to a small lima bean, and you do want to have a fair amount of strawberry juice.
  2. Stir the sugar gently into the berries, mixing it in quite thoroughly, and let it sit for twenty minutes.
  3. In a small saucepan, combine the water and the pectin. Bring them to a boil, stirring, and let the solution boil for a full minute. Do not stop stirring it.
  4. Pour the pectin solution over the strawberries, and gently mix it so all the berries are coated, for about three minutes.
  5. Immediately pour the jam into the prepared jars or frozen food containers, leaving at least a 1/2 at the top.
  6. Cover the containers with lids and let them cool to room temperature, then freeze them.

You can use the basic recipe to make small batches of other fruit jams, too, by using roughly the same amount of crushed or chopped fruit. Always use fruit that is perfectly ripe that you'd be quite happy eating "as is." For apricots or peaches, you need to add a teaspoon of ascorbic acid to the sugar, or three tablespoons of orange or lemon juice to the crushed fruit, to prevent them turning brown. For raspberries or blackberries, you might want to press most of the fruit through a strainer to remove as many seeds as possible. I've had both very good luck with blueberries, and very bad—on two occasions, for no reason that I can see, the blueberries did not jell; however, it made amazing blue berry syrup, so I didn't bother with the traditional "fix," which is to bring the jam to a boil again, and add a little lemon juice. You can make fabulous mango jam this way, but the mangos have to be perfect in terms of flavor.

Food, Inc. Takes on America’s Food System

America’s food system doesn’t just have a negative impact on our health as a society. It also effects our economy, environment, and worker’s rights. Considering the old adage “you are what you eat,” it’s no surprise that the issue of food is connected to so many others.

The new film Food, Inc. examines these connections and shows just how the food we get from the supermarket really gets there. Debunking the sweet animals-on-the-farm myth that children are still taught, it shows how animals today are produced mainly through factory farming, and how the hormones and pesticides used on animals and the plants they—and WE—eat can be very harmful.

Any American who wants to be healthy, promote health in his or her family, school, and community, or is an environmentalist should see this film. Even if you already buy local, organic food, chances are you may not know much about the campaign to properly label food, or the plight of the average farm worker. And once you see the film, you may wish to have friends and family go—or even schedule a summer field trip for camps or classes that may be in session if possible.

Food, Inc. doesn’t end with a movie, either. It also encompasses activism and lifestyle changes people can take to create a healthier food environment in America. At the film’s website there are facts about the issues covered and introductions to everything from cloning to food borne illnesses to pesticide use and more.

There is also a fun interactive page on healthy food choices in cafeterias, a petition for a reauthorization of the Child Nutrition Act, and a reading list for more information.

Perhaps the best tool from the site is its list of tips to use for changing our food system that everyone can use. Some of the tips include shopping at farmer’s markets, eating at home instead of at restaurants or buying fast food, and asking schools to stop selling junk food. Most of these tips are easy actions that all of us can do to create a more sustainable, healthy nation.

Finally, the site links you to another site called TakePart.com which allows you to take action on a variety of other issues, from discovering your own “foodprint” to ending world hunger. Food truly is a universal need, and has quickly become an equally universal issue.

Food, Inc. opens this month. For show times near you, click here.


Easy Strawberry Shortcake

Just about everywhere in the U. S. right now, you can find fresh locally grown strawberries. It's almost impossible, for me at least, to look at a pint of fresh strawberries and not at least think about strawberry shortcake. Now, I have strong personal opinions about shortcake, and how to make it, and those opinions include an intense aversion to the pre-made packaged sponge-cakes designed for strawberry shortcake. One of my fellow sufferers when I lived in a dorm used to make "Faux Strawberry Shortcake" with, I kid you not, Twinkies and Cool Whip garnished with fresh berries. I'm here to tell you that there's a much better way to easily, quickly make your own Strawberry Shortcake. The secret? Frozen Pound Cake, from your grocer's frozen dessert case. These are already baked, and ready to go after a few minutes at room temperature. Sara Lee makes a good frozen pound cake, and I'm sure there are others as well. Generally their are two sizes; a large complete cake, and a much smaller one meant for one or two servings. The recipe that follows assumes that you are making strawberry shortcake for two people.

Ingredients

  • 1 pint of perfectly ripe fresh strawberries for each two people
  • 8 ounces of heavy cream, whipped OR one spray can of Real Whipping Cream
  • 1 frozen pound cake
  • 1 Tablespoon of orange juice
  • 2 or 3 Tablespoons of Sugar

Procedure

  1. Remove the frozen Pound Cake from the freezer and thaw according to the manufacturer's directions. It's actually rather pleasant on a very hot day for the cake to still be chilled but fork-tender.
  2. Wash, drain, and de-stem the strawberries using your fingers or a sharp paring knife.
  3. Sort through the strawberries, removing and setting aside a few particularly attractive berries to use as garnish.
  4. Slice the remaining berries into a bowl. Very small berries may left whole.
  5. Try at least one of the berries to determine how sweet they are.
  6. Drizzle the orange juice over the berries, and gently turn them over to coat them with a mixture of berry juice and orange juice.
  7. Sprinkle some of the sugar over the berries, sweetening them to taste. Less is actually more in this case.
  8. Gently turn the berries over to mix and melt the sugar.
  9. Put the berries in the fridge if possible to marinate.
  10. Slice the pound cake so that you have two slices for each person.
  11. Place one slice of pound cake on each of two small plates or bowls.
  12. Cover the slices of pound cake with whipped cream.
  13. Layer, using your fingers and/or a spoon or fork, half of the berries over each slice of pound cake.
  14. Pour the remaining juice over the berries.
  15. Top the berries with a garnish of whipped cream, and decorate with the reserved berries you set aside.

There are many, many, variations possible. You can double up the slices of pound cake, alternating them with whipped cream and additional berries, for larger portions. You can mix the strawberries with other fruit—fresh peach slices, or blueberries, for instance. You can substitute lemon juice, or Grand Marnier or Courvoisier for the orange juice (if you use alcohol to flavor the berries, do let them marinate a bit). If you're whipping your own cream, try adding just a little sugar (no more than a scant teaspoon) and a dash or two of Grand Marnier or Courvoisier to the whipping cream. It is possible to use frozen berries, but that kind of defeats the point; it's the fresh strawberries that makes this dessert something to savor.

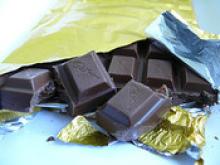
The Health Benefits of Dark Chocolate

Earlier this year, lisala wrote a story about the antioxidants found in dark chocolate, as well as the benefits of dark chocolate with red wine. (Talk about sheer decadence for your health! If you haven’t read that article, be sure to find out how much is too much of the delicious duo—and how much you can have in your diet.)

But did you know that dark chocolate is loaded with other health benefits? A small dark chocolate bar every day can actually help your heart, as well as your cardiovascular system. Here are some great ways that dark chocolate can improve your life—aside from tantalizing your taste buds:

Dark chocolate can reduce bad cholesterol by up to 10%.

One study has shown that dark chocolate may prevent fatty substances from clogging the bloodstream, protecting your arteries from becoming clogged as well.

All types of chocolate stimulate production of endorphins as well as serotonin, which creates a happy feeling—lowering stress and helping you to relax, as well as reducing pain.

If you are okay with ingesting caffeine, dark chocolate can also give you an energy boost from that. (However, not as much as a cup of coffee will.)

If you have high blood pressure, listen up: dark chocolate has been found to help lower blood pressure.

And one thing to keep in mind is that while yes, chocolate does contain fat, only a third of it is an unhealthy saturated fat.  In fact, one third of the fat found in dark chocolate is the same kind of healthy fat found in olive oil.

None of this means that it’s OK to gorge on chocolate every day! It still has a lot of calories; in fact, one regular bar has 400 calories—the amount in a full meal for many people. To get the benefits, you do, however, need about 3.5 ounces of chocolate; so it’s your choice if you’d like to sacrifice other, perhaps more filling snacks, for some dark chocolate and its benefits.

And while milk chocolate does have some antioxidant benefits, it doesn’t have the benefits of dark chocolate listed above; to get these benefits, you’ll have to go for the dark variety. This is because dark chocolate has a cocoa content of 65% or higher, rather than being made up of other unhealthy additives.

Also, chocolate syrups and cocoa powders are usually processed so much that their antioxidants and benefits are typically removed. So go for that raw, rich dark chocolate!


Slow Roasting: The Key to Good Chicken

If the prices at any given grocery store are any indication, people are afraid of raw chicken with the bone in. There's some myth that boneless, skinless chicken breast is easier to cook, or somehow healthier. Not only is this untrue, but those boneless, skinless chicken breasts also happen to be pretty tasteless, too. This isn't to say a capable hand in the kitchen can't make a tasty boneless breast, only that it's more expensive and a lot harder than getting delicious results from bone-in varieties.

Before we get into any actual recipes, let's talk about the irrational aversion to dark meat. I don't know where this started or if it was some kind of marketing ploy, but dark meat chicken not only has more flavor, it is arguably healthier than white meat. The only thing white meat has over dark in the nutrition department is that white meat has less overall fat in it, but as any good cook ought to know, there's fat and then there's fat. The fat you'll find in dark meat tends toward the Omega 3 and Omega 6 varieties, which are what we humans would consider "good" fats. Sure, it still has those nasty saturated fats, but that's what slow roasting is for.

Slow roasting is exactly what it sounds like. Instead of cooking your chicken a short time at a high temperature (350-375 degrees F), slow roasting has you cooking it for a lot longer at a low temperature (200-250 degrees F). This process allows the fat to render out of the chicken instead of potentially burning in and around it, and it also promotes the breakdown of connective tissues that make for tough, chewy meat.

Let's say you have some thighs and drumsticks, about two or three pounds worth. Making a top-notch entree requires just a few ingredients and a little more time than you're probably used to. Coarsely chop some onion, carrot and celery (a classic French mirepoix) and toss it into some heavy tin foil with your chicken. Make sure to season your chicken both on and under the skin with salt, pepper and your favorite herbs (rosemary and thyme do rather well). Wrap the entire collection in the foil, but not so tightly that steam can't escape. For a little extra flavor, you can try adding some chopped bell peppers to the mix as well, and/or substituting your white onion with a sweet red.

Pop your foil wrap into a preheated 200 degree oven and keep it there for at least 2-2.5 hours. Depending on your oven and the amount of chicken you use, this may not be enough time. You may need to go as long as 3-3.5 hours to make the chicken safe to consume. You'll know your chicken is ready when the meat barely clings to the bone and everything is dark throughout. If you see redness in the meat, it's not done yet. Don't be afraid of a little reddish liquid, though. That's just water and protein brought to the surface by the sustained heat. Let your chicken rest, covered, outside of the over for at least 15 minutes and those juices should settle.

The chicken and vegetables should be delicious as they are, but if you want to make a gravy, now is the time. Your foil should have plenty of juices from everything inside and there's no reason to waste all that flavor and moisture. Simply put the liquid into a heavy pan on low heat, add a few pinches of all-purpose flower and maybe some extra seasoning. The mixture will reduce and thicken, resulting in a delicious home-made gravy.

Served on the bone or sliced with a side of vegetables and a cool salad, this simple, slow roasted chicken will be one of the best, most reliable meals on your home menu. There's no reason to fear the flavor or the bones of dark meat. Quite the contrary, it makes for a delicious dish in the right hands.

Pages