News of bacon shortage overblown

There is no need for a bacon panic!

Last week a trade organization for pork producers sent out an alarmist press release threatening that next year may see a bacon shortage in the wake of this year's problems with the global corn crop. It's obvious if you scratch the surface that this is little more than a marketing gambit, and a successful one to boot. But that never stopped the presses before, and it hasn't stopped them since. Thus this week we have been treated to a rash of "Bacon Shortage Forecast" news stories that breathlessly describe a future in which there is no bacon.

The first and most obviously suspicious thing about this news item is that it comes from an organization whose sole purpose is to convince the public to buy more pork. The National Pig Association of the United Kingdom is hardly going to put out a press release saying "Bacon supplies are fine, there is nothing to worry about" or even "2013 may see slight increase in bacon prices." That's not the kind of thing that will grab headlines, and more to the point, it's not the kind of thing that will frighten people into buying more bacon.

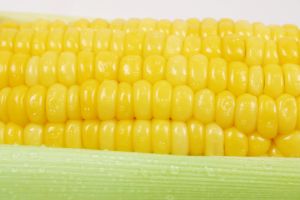
This year has definitely been a bad one for the corn crop. Globally we were already seeing record high demands for corn, between the rise in its use as biofuel, and this summer's drought which caused many crops to fail. Corn prices will be rising for the next year, which is a pity, because we use corn in pretty much everything.
 
The price of food is going to be rising across the board, not just in the bacon aisle. Everything is going to be getting more expensive, which will cause a lot of global hardship.
 
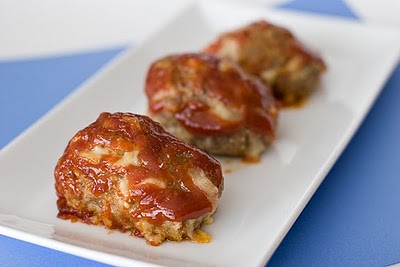
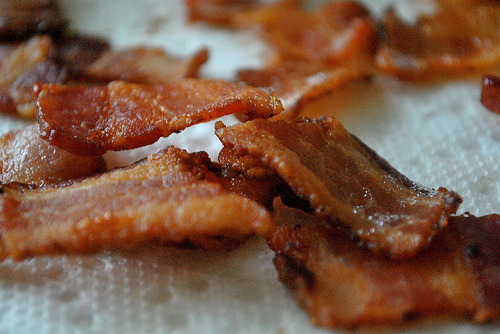
However, it isn't likely to cause a bacon shortage. It will probably, however, cause the price of bacon to rise. Which is too bad, because bacon is already pretty expensive stuff.
 
Of course, it will also cause the rise of pork chop prices, not to mention beef and chicken prices too. But that again is not the sort of thing that grabs attention. The problem is, we feed corn to all of our meat animals. If their feed costs rise, so does the cost of their meat.
 
So a bacon shortage? No. Bacon more expensive? Almost certainly yes. Frankly I don't mind too much, since bacon isn't a staple for me, it's more of a rare treat. I can handle having a price increase on occasional indulgences. It's the rising cost of staple foods that I find a lot more alarming.

Homemade granola bars

Tasty and free of ingredients you can't pronounce.

I got sick of hearing about ingredients in granola bars that were bad for you. Even the granola bars that I thought were all-natural, turned out not to be. I wish there was better standards in being able to declare something “all-natural.” There was really nothing left to do but to make our own granola bars so we know exactly what we're eating.

You will need the following ingredients to make your own homemade granola bars:

  •  
  • 1/4 c. butter
  • 1/4 c. local honey
  • 1/3 c. light brown sugar
  • ½ tsp. vanilla
  • 1 c. quick cooking oats
  • 1 c. Rice Krispies
  • 1 c. granola
  • ¼ c. raisins
  • ½ c. chocolate chips


Follow this recipe to create your own homemade granola bars:

Step 1:
Melt your butter in a small pot.

Step 2:
Stir in the local honey, brown sugar, and vanilla. Cook for 3 minutes and then remove from the stove.

Step 3:
Pour the quick oats, Rice Krispies, granola, and raisins in a large mixing bowl. Stir to combine the ingredients.

Step 4:
Place the contents of the small pot into the large mixing bowl and stir again until everything is combined.

Step 5:
Line a rectangular baking pan with wax paper. Press the homemade granola bar mixture into the pan.

Step 6:
Melt the chocolate chips in the microwave in 30 second increments. Drizzle over the homemade granola bars.

Step 7:
Set the baking pan in the refrigerator until the ingredients cool.

Step 8:
Cut the granola bar mixture into actual bars.

Step 9:
Eat up!

Tip:
Store excess granola bars in snack baggies in the refrigerator until you want to eat them.

Homemade pepperoni rolls

Great for serving during a football game.

I love football season. Not only do I love cheering for my Eagles, but I also loving having people over and serving some delicious football snacks. This week I'm making homemade pepperoni rolls. I don't know anyone that doesn't love a good pepperoni roll!

You will need the following ingredients to make homemade pepperoni rolls:

  • Non-stick cooking spray
  • 1 pkg. pepperoni slices
  • 8 oz. Shredded mozzarella cheese
  • 2 Tbsp. Parmesan cheese
  • 2 pkg. crescent rolls


Follow the steps below to create your homemade pepperoni rolls:

Step 1:
Spray a pizza pan with non-stick cooking spray.

Step 2:
Unravel your crescent rolls and lay them flat on your pizza pan.

Step 3:
Sprinkle 1 Tbsp. of Parmesan cheese on top of the crescent rolls. Save the other tablespoon for later.

Step 4:
Place a thin layer of pepperoni slices on the crescent rolls.

Step 5:
Top the pepperoni slices with mozzarella cheese.

Step 6:
Roll the crescent rolls up.

Step 7:
Sprinkle the remaining tablespoon of Parmesan cheese over the tops of the crescent rolls.

Step 8:
Cook the homemade pepperoni rolls in a preheated oven that has been set to 375 degrees F. for a total of 10 minutes, or until the crescent rolls are golden brown in color.

Step 9:
Cut into slices and serve hot on a fancy platter.

Tips:
You can substitute cheddar or Monterey jack cheese for the mozzarella cheese if you want.

Sometimes I like to use deli salami instead of pepperoni. Believe it or not, it tastes great in the crescent rolls. You can make one package of crescent rolls with pepperoni and one with salami and hold a taste test.
 

Best mini-meatloaves ever

Make three small meatloaves instead of one big one.

I love making meatloaf for dinner, but I got sick of it taking so long to cook. That's when I got the idea to create a few mini-meatloaves instead of one big one. This cut cooking time almost in half. Here is how I make them:

You'll need the following ingredients to make your mini-meatloaves:

  • 1 ¼ lb. ground beef
  • 1 egg
  • 1 small onion diced
  • ½ small green bell pepper chopped
  • 2 garlic cloves minced
  • 1 tsp. fresh parsley
  • 1 Tbsp. Worcestershire sauce
  • Ketchup


Follow these steps to make your mini-meatloaves:

Step 1:
Place the ground beef, egg, small onion, green pepper, garlic cloves, parsley, Worcestershire sauce and 2 Tbsp. of ketchup in a large mixing bowl. Mix until all of the ingredients are combined.

Step 2:
Separate the meat into three equal sections. Place the mini-meatloaves in a baking dish.

Step 3:
Spread a thin layer of ketchup over each of the mini-meatloaves.

Step 4:
Preheat your oven to 375 degrees F. Set your mini-meatloaves in the oven and bake for 35 to 40 minutes.

Step 5:
Serve with potatoes and a vegetable.

Tips:
You can use garlic and onion powders if you don't have any fresh garlic or onions on hand.

If you don't have a green bell pepper, use celery instead. It tastes just as good.

Warning:
Ground meat should always have an internal temperature of between 160 and 165 degrees F. before you eat it. Use a meat thermometer in the center of each meatloaf to be sure it is safe to serve your guests.
 

Dress up your corn on the cob

Use more than just butter to add flavor to your corn on the cob.

Corn on the cob tastes great when smothered in butter, but you can give it a bit more flavor than that. I have a few different recipes I like to use to give my corn on the cob a little pizzazz so that my family doesn't get bored with just plain butter.

Ranch dressing corn on the cob: Once your corn has finished cooking on the grill, mix ¼ cup of mayonnaise with 1 Tablespoon of dry ranch dressing mix. Spread this yummy dressing over the corn. Let it melt a bit and eat away.

Parmesan cheese corn on the cob: Melt ½ stick of butter and mix in 2 Tablespoons of Parmesan cheese. Drizzle this mixture over the grilled corn before chowing down. Sometimes I even like to sprinkle a little bit of pepper on the corn as well.
Bacon flavored corn on the cob: Wrap the corn on the cob with slices of bacon. Set inside a foil packet and cook over the grill. I remove the bacon before I eat the corn. I eat the bacon separate, but cooking it over the corn infuses a bacon flavor that you are sure to enjoy.

Caesar corn on the cob: Pour ¼ cup of Caesar salad dressing in a bowl. Heat it up in the microwave. If you don't it won't taste right on the corn because the corn will be hot and the dressing will be cold from sitting in your fridge. Drizzle the warm Caesar salad dressing over the corn before eating.

Tip: Plenty of butter manufacturers also make butters that are flavored with various spices and cheeses. These also make great toppings for grilled corn on the cob.

Make perfect home fries

Delicious at brunch or dinner

Home fries are one of my staple meals, whether it's a weekend brunch or a weekday dinner. A plate of home fries plus a fried egg equals a delicious, easy meal. Once you know the basics, home fries are simple to prepare and take only about half an hour from start to finish, with very little involvement on your part.

1. Selecting your potatoes
Although any potato can make a decent batch of home fries, yellow potatoes are generally recognized as one of the better varieties for this purpose. Yukon Gold is the undisputed champ of yellow potatoes, but regular old yellow potatoes in a five pound mesh bag will work well, too.
 
Yellow potatoes work better because the starch and SCIENCE and reasons. I don't know. All I know is, Idaho bakers often turn out grainy, and red potatoes - while good - just are not quite as delicious in this preparation.
 
2. The pan
I have a no-stick Teflon pan that I keep basically just for this purpose. I treat it as gently as a newborn child, and only use wooden spoons in cooking. A good non-stick pan is crucial for home fries. Otherwise the potatoes stick to the pan and become impossible to flip. And without flipping, they won't cook properly.
 
Add a generous few glugs of extra virgin olive oil and set the pan on medium heat to pre-heat while you dice your potatoes.
 
3. The dice
You want to slice up your potatoes into cubes no larger than the key on a keyboard. The smaller the better, to a certain extent. Smaller pieces cook better; the larger the pieces, the more likely they will remain crunchy and undercooked.
 
4. Cooking
Mix the potatoes around in the pan to cover them with oil. Then let them be. It's important not to fuss with them, or you won't get a nice brown crust. 
 
Give them a generous sprinkle of salt and pepper. I usually like to add a little something extra, whether it's a dash of grilling spice or a sprinkle of thyme or rosemary. But resist the urge to over-spice them; it just masks the basic deliciousness that is the potatoes themselves.
 
Cook them for 20 minutes on medium, then reduce the heat a touch (to keep them from burning) and cook another 10 minutes. Flip them 3 or 4 times over this time period, whenever you hear the sizzle sound change and become higher-pitched. Test the larger chunks for doneness. It's better to overcook them than to undercook them. Patience is the key!
 

Poor people aren't the ones eating at McDonald's

But that doesn't stop the middle class from pointing fingers.

Reporter Tracie McMillan has spent a lot of time analyzing what Americans really do with their food - how they get it, and where it goes. And she has come to some interesting, and occasionally counter-intuitive results.

The debate that swirls around poverty, obesity, and food dollars is hotly contested and often ugly. Many people assume that the poor are obese because all they do is eat at McDonald's. But as McMillan points out, the poor are on SNAP (a.k.a. "food stamps") and SNAP only buys you food at the grocery store. It doesn't work at McDonald's or any other fast food chain. (Although some municipalities are working to change that. That's a whole 'nother argument.)
 
Study after study shows that in fact, it is the middle class which is eating at McDonald's. The upper class either goes out to restaurants or hires a personal chef. The working class either cooks meals at home or skips them altogether. (1 in 25 Americans admit to skipping a meal because they couldn't afford it.)
 
If you have ever been poor, these results are unsurprising. A meal at McDonald's costs between $3-7 per person, and that's a lot of money if you are making minimum wage. Most people under the poverty level are aiming for a per-meal cost of $1 per person or less, and that includes SNAP funds.

Basically what we have is a situation where the middle class eats at McDonald's, pretends that it doesn't, and blames the poor for being fat because they eat at McDonald's. I suppose you can chalk it up to that old adage that "we hate most in others what we hate about ourselves." 
 
Meanwhile, most of the more vocal proponents in the public discourse have never actually met a poor person, much less bothered to ask them what they eat. The statistics don't lie, though: poor people eat less fast food than middle class people. (Notwithstanding the bucket of chicken that Precious steals from KFC.)
 
Poverty doesn't mean eating at McDonald's. When I was a kid, my mother and I were poor, and McDonald's was a treat on par with "where we go for someone's birthday," not a weekday meal. 
 
Poverty means rice for dinner every night, with a different bag of frozen vegetables microwaved and mixed in. Poverty means buying one of the cheap loaves of store brand bread, the kind that are about three inches high and two feet long, and using the entire thing to make peanut butter and jelly sandwiches for the week. (Peanut butter may be expensive, but it's also a common item at food banks.) Poverty does not mean Big Macs.
 

Fun things you can do with marshmallows

Tasty marshmallow creations

My youngest daughter is obsessed with marshmallows. She literally goes crazy when she sees one. Instead of just handing her a few plain marshmallows, I look for ways I can make the marshmallows more exciting to eat. Here is what I have come up with:

Marshmallow kabobs: Take a bamboo skewer and slide a marshmallow half way down. Next, slide a strawberry and then another marshmallow. Follow that with a cantaloupe ball and another marshmallow. Finish up with a ball of watermelon and another marshmallow to top it all off.

Yogurt marshmallow pops: Place a marshmallow on the end of a popsicle stick. Dunk it in a cup of yogurt (whatever flavor you like) and roll it in graham cracker crumbs. Place it in freezer for a few minutes so that the yogurt hardens up a bit. Eat away.

Marshmallow Jell-O: Make your favorite package of Jell-O according to the directions. Drop a few marshmallows and banana slices into the gelatin while it is still a liquid. Set in the refrigerator for the designated amount of time.

Marshmallow snowman: Marshmallow snowmen are a favorite around Christmas time. Place three marshmallows on top of each other. You can use icing to join each marshmallow or insert a toothpick in the center. Cut a strip from a piece of a Fruit Roll-up to use as a scarf for the snowman. Cut out a triangle from the same piece of Fruit Roll-up to use as the snowman's nose. Mini chocolate chips work great to create eyes, a mouth, and buttons down the middle marshmallow. If you don't have any mini chocolate chips, you can use chocolate jimmies instead.

The truth about food waste

You're not the one wasting it - groceries and restaurants are to blame

I'm sure you have seen the headlines. "Americans Waste 40 Percent Of Their Food." It catches your attention, doesn't it? And it feeds perfectly into the image of the fat, wasteful American. But who ARE these people who are throwing away almost half of the food they buy?

Well, it turns out that this statistic is misleading. And so are the articles and news stories built around it.
 
Here is the truth: commercial places like restaurants and grocery stores throw away 40 percent of their food. The problem isn't you and I, it's them. The invisible corporate machine that would rather try to convince you that this is your personal problem to solve. Just like so many other problems, the effort is to convince Americans that they are bad people who are at fault, while the corporations get off free. This is true of emissions (personal vehicles account for only 5 percent of total emissions), recycling, oil usage, plastic waste… for just about any environmental problem you would care to identify, our personal actions are only the tip of the iceberg.

But it makes a better, more gripping story if you divide up the numbers and then try to blame a family. Like when CNN says that "20 pounds of food is wasted each month for each of 311 million Americans." Sure, but that's per capita food waste, not the amount being wasted by each of those Americans. If you take everything the grocery store throws away, then divide it up by the people in your town, it's going to look bad - but that doesn't make it your fault.
 
In fact, American families only throw away about 25 percent of the food and drinks they purchase. This is a much more reasonable number. It's still not perfect, but if you are trying to eat healthy it means buying a lot of fresh meat and produce, and it's only natural that some of it will go bad before you can eat it. The alternative would be a diet composed entirely of frozen and canned food, which is arguably worse for the environment than throwing away 1/4th a head of lettuce that has gone black and slimy.
 
American food safety rules are strict about what can and cannot happen with food. These rules often prevent grocery stores and restaurants from donating perfectly good food to homeless shelters and other worthy causes. No one wants to waste food, and it's time we start addressing the real problem in order to find some good solutions.

How to make real stove top popcorn

It's easy and delicious to make popcorn from the kernels!

Microwave popcorn is a Godsend, don't get me wrong. But if you want to avoid all the crazy chemicals, control the ingredients (I recently went gluten free, and while popcorn itself is gluten free, microwave popcorn often contains gluten), or make a delicious snack (okay… meal) for a fraction of the price, "real popcorn" is the way to go.

But how do you make popcorn using just the kernels and a pan? Don't worry, it's easy!
 
First, some basic principles. 

1. High temperature
You want to cook the popcorn as hot as you can without scorching it. The hotter the pan, the faster the pop. The faster the pop, the better the pop. A slow pop will result in tough, chewy kernels that are no fun to snack on. A faster pop will give you big, puffy popcorn flakes.
 
Popcorn will pop at temperatures as low as 250 degrees. But the optimum temperature is more like 400 degrees. That's pretty hot: on most stoves, it corresponds to "medium high." 
 
2. Timing is everything
Be sure your oil is hot enough before you add the kernels. Otherwise you end up with tough popcorn. Use the "three kernel method:" put three kernels of corn into the pan as you heat it up. When the three kernels pop, you're ready to dump in the rest of your kernels.
 
3. Steam is the enemy
You want to put a lid on your pan, to keep the popcorn from flying everywhere. But you also want to let as much steam escape as possible, because steam will make your popcorn soggy and lifeless.
 
The best solution is to put a lid on the pan, but keep it ajar to let the steam escape. 
 
4. Quality is key
The more expensive the popcorn, the better the results. You will get far better results from a plastic jar of Orville Redenbacher kernels than you will from one of those giant four-pound bags of store brand popcorn. And you get better results still from a specialty brand like Just Poppin'.
 
The procedure, then, is simple. Add three tablespoons of oil to the pan, and set it at medium high heat. Drop in three kernels. When your indicator kernels pop, dump in between 1/3rd and ½ cup of popcorn kernels.
 
When the popping slows to a few seconds between pops, remove the pan from the heat. Take the lid off to let the steam escape. (The weight of the popped kernels should prevent any stray kernels from flying out.) Don't let it sit in the pan - dump it into your popcorn bowl as soon as you can. Otherwise the popcorn on the bottom may scorch, and the steam will build up and condense on your delicious kernels.
 

Pages