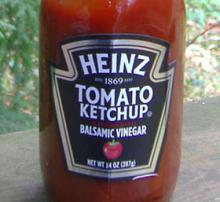
Heinz Limited Edition Balsamic Ketchup

Spoiler alert: IT IS DELICIOUS.
Here is a phrase I never would have guessed I would find myself saying: this week I received the special ketchup that I ordered off Facebook. Isn't it weird, living in the future? AND AMAZING.
 
Here's how this went down. When Heinz decided to float a limited edition version of their classic ketchup with balsamic vinegar, someone in the boardroom got really excited about "the power of social media" and other such buzzwords. Networking! Retweet! Like like like!
 
I don't remember how I first heard about it. (I spend a lot of time on the internet, I'm basically a basking shark, filter feeding off the internet and sieving out the good stuff for a living.) But it was announced that on one particular day, if you went to the Heinz Ketchup Facebook page, you would be able to order the limited edition ketchup. This would allow you to try it (and hopefully Tweet about it) before its official launch in stores.

 
Now granted, there were some problems with the page on Buy Day. And admittedly there was a shipping SNAFU which meant that it took almost a month for my fancy-ass internet ketchup to arrive. But because of the problems, Heinz gave everyone free shipping, an extra bottle of ketchup, and one of their new Dip & Squeeze Packets. And for pity's sake, it's just ketchup, let's all keep a sense of perspective about things, shall we?
 
So the ketchup finally arrived and, spoiler alert, IT IS DELICIOUS. As soon as I opened the box I cracked a bottle and tasted a little dab off my pinkie finger, vice cop-style. My first thought was, "This has ruined me for ketchup forever."
 
Normal ketchup is made with white vinegar. This is exactly the same as their regular stuff, but with balsamic vinegar. It's like, umami to the max, dude! It tastes like if regular ketchup and Worcestershire sauce had a baby, and ketchup and barbecue sauce had a baby, and then those two babies had a baby. Still with me? Look, it's really tasty, that's the take-away point here.
 
I encourage you to buy this when you find it in stores. Because hopefully if they sell enough bottles quickly enough, balsamic vinegar ketchup will become a Regular Thing, and I won't have to go without. At the very least, you will want to stockpile this against the coming Zombie Apocalypse. Because what if there were zombies and all you had were tater tots and regular ketchup? YOU WOULD BE SO SAD. 

Candy Cane Rice Krispies Treats


My kids love Rice Krispies treats, so this year I went in search of a way to turn the recipe into something more festive. I came across a recipe that turns ordinary Rice Krispies Treats into candy canes. This change is also perfect for school holiday parties, or office Christmas parties if you are required to bring something.

Follow the traditional Rice Krispies Treat recipe by melting 3 tablespoons of butter in a pot, and then adding an entire package of mini-marshmallows. Stir continuously until the marshmallows have melted. Remove the pot from the heat, and dump in 6 cups of Rice Krispies. The store brand works just as well if you need to save a few dollars. Stir until the Rice Krispies have been coated in the marshmallows.

Lay several sheets of wax paper over some baking tins. While the Rice Krispies are still warm, mold them into candy cane shapes. You need one candy cane for each student, or coworker that will be attending the party. Place the candy canes on the wax paper, and wait for them to cool completely before continuing.

Since candy canes have red stripes, you will need to add red stripes to the Rice Krispies candy canes. This can be done in one of several ways. You can use a red gel icing and pipe the stripes on each candy cane, or you can lay red skittles in strips over the candy canes, using a little icing as glue.

You will need to serve the Rice Krispies candy canes within 24 to 36 hours of making them, or they will begin to become to hard to chew.


RECAP - What you need:

3 Tablespoons of butter

1 Package Mini Mashmellows (16 ounce or larger)

6 Cups Rice Krispies (or generic)

Red gel, icing, skittles, candy canes or other festive decorations


RECAP- WHAT you need to do:

- Lay several sheets of wax paper over some baking tins.

- While the Rice Krispies are still warm, mold them into candy cane shapes.

- Place the candy canes on the wax paper, and wait for them to cool completely before continuing.

- Decorate

- Serve within 24 to 36 hours of making them

Bay Laurel Vs. California Bay Laurel

One is a tasty spice - the other is edible, but dubious


Bay leaves are one of those magical herbal ingredients that not only flavor a sauce or soup, they seem to bring the whole thing together. It's a pity that they are A) so expensive, and B) something I don't use often enough. It's one of those spices that I can almost guarantee you will always be stale in my cupboard.
 
I was intrigued when my neighbor offered to let me pull leaves off of her "bay tree" and use them whenever I liked. The prospect of fresh bay was exciting, I had never tried it fresh, and I know that most herbs are so much more delicious fresh! What was growing in her yard sure looked like bay leaves, but when I crushed the leaves between my fingers, they smelled like camphor and eucalyptus. 

 
Back at home I did a bit of research and found out what was going on. My neighbor, like many people on the west coast, has a California Bay Laurel tree (Umbellularia californica). This is a bushy shrub or small tree which has a lot of colloquial names, among them "Headache tree."
 
Bay leaves as you find at the store are from a related shrub, the Bay Laurel (Laurus nobilis). Bay Laurel likes a hot Mediterranean climate, while California Bay Laurel prefers cooler environments like those found on the Oregon and Washington maritime climate.
 
Both Bay Laurel and California Bay Laurel leaves are rich in a lot of pungent essential and volatile oils. California Bay Laurel leaves are edible, it's true, but they have a much higher percentage of menthol and eucalyptol. (Which explains why, the one time I tried using it in roast chicken, my dinner ended up tasting like a cough drop.) California Bay Laurel also contains a considerable amount of Umbellulone, which is a ketone that causes headaches.
 
(Incidentally, Texas Mountain Laurel is thought to have hallucinogenic properties, but this is largely due to a case of mistaken identity. Texas Mountain Laurel is a legume which is not related to either Bay Laurel, and it is very toxic. Neither California Bay Laurel nor regular Bay Laurel contain hallucinogenic substances. Although I have been told that if you dry and smoke California Bay Laurel leaves, you develop a splitting headache, which I have no doubt is true.)
 
California Bay Laurel makes a very nice addition to the yard, and the scent of its leaves is an interesting perk. But I wouldn't recommend cooking with it, unless you fancy food that tastes like a cough drop and gives you a headache.

'Tis the Season For Gingerbread Waffles

with this Recipe

This recipe for gingerbread waffles is sure to spice up your winter. After they are done, drizzle on some vanilla ice cream sauce and syrup.

For the Waffles:

  • 1 1/2 cups flour
  • 2 tsp. baking powder (didn’t make it into the picture)
  • 1/2 tsp. salt
  • 1/2 tsp. cinnamon
  • 1/2 tsp. allspice
  • 3/4 tsp. ginger
  • 1/2 stick butter, melted
  • 1 Tbs. molasses
  • 1 1/2 cups milk
  • 3 eggs, separated

Heat the waffle iron.  Beat the egg whites in a mixer bowl until stiff peaks form.

Mix the dry ingredients in a bowl.  Add the molasses and milk to the melted butter, then beat in the egg yolks.  Stir into the flour mixture until just combined.

Fold the egg whites into the batter until just combined.  Put about 1/2 cup of batter into the waffle iron and cook until done.

For the Vanilla Cream Sauce:

  • 2 cups milk
  • 1/2 cup sugar
  • 2 Tbs. cornstarch
  • pinch of salt
  • 1 Tbs. butter
  • 1 1/2 tsp. vanilla

Put the 2 cups of milk in a saucepan and heat it over medium heat until bubbles form around the edge of the pan.  Mix the sugar, cornstarch and salt together.  Gradually add this to the milk.  Cook over medium heat, stirring constantly until it begins to thicken a bit.  Don’t boil it.  Pull it from the heat and add the butter and vanilla.

It’s best to make the sauce first, then fix the waffles.  It will stay warm while the waffles cook.

Sometimes Tea is Best In A Can

A can of tea can be deceiving, can't it?  It makes you wonder if it is really tea or not.

Is it ok for me to drink this and not be seen as some sort of hip tea drinker, mocking the crowds around me with their coffee mugs?

I believe that sometimes, a can of tea can be just the thing to refresh and inspire, if inspiration is capable from a drink.  It is funny how many varieties of teas there are to choose from when it comes to tall cans.

A new brand known as Peace Tea is something very refreshing and has a wonderful idea, that tea cannot only be a drink but it can inspire peace in those that drink it and hopefully that will lead to those that they inspire.

I'm not sure if you have heard of this tea before or if you have even tried tea in a can but I must encourage you to take a sip.  I especially like the Ceylon tea(blue can) because of it's sweet taste.

If not for the design of the can, the amazing art that I always find myself examining while drinking, and the very affordable 99 cent price, I'd be missing out on something that cannot be replaced by anything.

To me this is an essential tea for those on the move.  If you haven't the time to brew your own, why not pick one of these guys up and enjoy on your run to whatever important meeting you have to be fashionably late for.

And heck, they even have a pic of Bill Murray with one.  That should sell it plain and simple.

A Healthy Bug

Indulging in a fat free diet is quite the challenge. There are fat free foods out there and incorporating them into one’s diet is a healthy step towards an overall, healthier lifestyle. Yet, it isn’t uncommon to incorporate some fat free options with low fat options, in an effort to keep our meals manageable and with variety.

I am not a diet guru…I have not tapped into every diet fad out there. I have tried some, none with too much enthusiasm, and have found for me, trying to eat healthier while tossing in some exercise is my best plan. The hardest part about my plan is ensuring that the calories I am taking in are less than the calories I am burning throughout the day. I suppose that is the most simplest formula to losing weight. Don’t eat more than your body can burn.

Have you ever went to your gym, jumped on the treadmill or elliptical machine, exercised for a period of time, sweat dripping off your head….pushed the button to show your “calories burned” and were amazed and proud of yourself for the progress you made? I did that all the time. Yet, I wasn’t seeing the results I was hoping to see…and I didn’t understand it.

For any of you who are TV junkies, the Biggest Loser, is probably at least a show you have heard of. I haven’t always watched it, but one day made it through an episode and wondered what those bands were around their arms. I assumed since they were all wearing them, it had to be exercise oriented. I did a little research and found out that they were all wearing the Bodybugg.

I’m not going to lie…I rushed right out and bought it. It’s not a cheap tool, but with time, I have found that it was my saving grace. The Bodybugg armband does exactly what I couldn’t do. It monitors the calories that you burn throughout the day. You enter your food intake into a system that tracks your calories, etc. and the Bodybugg (worn on your arm), monitors what you are putting out. At the end of the day, you upload the armbands information into the program and you are able to see how much you took in and how much you burned…which allows you to gauge whether you are eating/exercising in a way that allows you to lose weight…if that is your goal. You can set up goals to lose, maintain or gain weight, depending on the path you are wanting to choose.

It can be a slightly time consuming tool, however, it gave me the knowledge I had been lacking. I hopped onto the treadmill again and at the end….compared my Bodybugg to the results the treadmill had given me. WOW! Quite the difference. All along I was under the impression that I was burning a significant amount of calories on this thing…when the reality was, I was burning calories…but not at the level I had hoped. This taught me to be more aware of what I was eating, what I burned while at work, the gym, asleep, etc. It helped me shed pounds, while allowing me to eat and do what I wanted.

Maintaining a healthy lifestyle is a challenge and we each have tools we use to aid in this process. For me, healthy foods, including fat free options and utilizing the Bodybugg have helped me tackle this challenge and come out ahead. This may not be the solution for everyone, but it may be worth checking out.

Cinnamon Roll Waffles

This Recipe will Definitely Make Your Mouth Water

Cinnamon rolls are definitely a treat in the morning, but why not turn it into a traditional breakfast favorite with this recipe from RecipeGirl.com for cinnamon roll waffles?

Ingredients:

Waffles:

  • 1 3/4 cups all-purpose flour

  • 2 Tablespoons granulated white sugar

  • 1 teaspoon baking powder

  • 1/2 teaspoon baking soda

  • 1/4 teaspoon salt

  • 2 large eggs

  • 2 cups buttermilk

  • 1/4 cup canola oil

  • 1 teaspoon vanilla extract

Cinnamon Topping:

  • 1/2 cup butter, melted

  • 3/4 cup brown sugar, packed

  • 1 Tablespoon ground cinnamon

Cream Cheese Topping:

  • 4 Tablespoons butter

  • 2 ounces cream cheese

  • 3/4 cup powdered sugar

  • 1/2 teaspoon vanilla extract

Directions:

1. Prepare waffles: In a medium bowl, whisk together flour, sugar, baking powder, baking soda and salt. Make a well in the center of the mixture; set aside.

2. In a separate bowl, whisk together eggs, buttermilk, oil and vanilla. Pour into the bowl with the dry ingredients. Stir just until moistened; batter will be slightly lumpy.

3. Preheat a waffle iron and spray with nonstick spray. Pour batter into waffle iron grid and close the lid. Bake until waffles are completely done- follow your waffle iron's instructions. Use a fork to remove finished waffles. Repeat with remaining batter. Keep waffles warm until ready to serve (a 200 degree oven is perfect).

4. Prepare cinnamon topping: In a medium bowl, mix butter, brown sugar and cinnamon. Scoop thze filling into a small zip baggie and set aside.

5. Prepare cream cheese topping: In a medium, microwave-safe bowl- heat butter and cream cheese for 30 to 60 seconds; just until melted. Stir together until smooth; whisk in powdered sugar and vanilla extract.

6. When ready to serve, place waffle on plate, drizzle cinnamon topping, then drizzle cream cheese topping. Use as much or as little as you'd like. Serve immediately.

Corn Casserole Recipe

"Feel free to add your favorite spices to this dish."

My sister’s father-in-law makes such a delicious corn casserole that everyone in the family requests it when we get together. I decided to give the dish a try, and found it really wasn’t that hard to make.

You will need the following ingredients to make corn casserole:

2 cups cream corn
2 cups whole kernel corn
1 1/4 cups of sour cream
1 stick of softened butter
8 oz. corn muffin mix
2 eggs
¼ cup bacon bits
1 Tbsp. parsley

Follow these directions to make the corn casserole:

Step 1:
Place the cream corn, whole kernel corn, sour cream, softened butter, corn muffin mix, eggs, and bacon bits in a large mixing bowl. If you aren’t a fan of bacon bits, you can cook fresh bacon until it is crispy enough to crumble into small pieces. Then add the bacon to the mixing bowl.

Step 2:
Blend the ingredients together by hand, and pour into a square or rectangular baking dish. Make sure you grease the baking dish first so that the corn casserole is easy to remove later on.

Step 3:
Place the corn casserole in an oven that has been preheated to 350 degrees F.

Step 4:
Cook the corn casserole for 45 minutes, or until you notice the surface turning a golden brown color.

Step 5:
Remove the corn casserole from the oven and decorate it with the parsley before serving it to your guests.

Tip: Feel free to add your favorite spices to this dish. For example, nutmeg and cinnamon both complement the dish.
 

The Making of Tea

"Do you microwave your water or let a tea pot heat before making your cup of tea?"

When it comes to making tea, what is the best method?

Do you microwave your water or let a tea pot heat before making your cup of tea?  Or do you have a special tea pot that keeps the tea warm while you sip your cup and contemplate the meaning of existence? 

Whatever way of warming or making tea, does it feel comfortable to you?

That is what makes tea the drink of the gods.  It has that calmness to it and it makes you feel like maybe, just maybe, you could touch the heavens with just the perfect batch.  And sometimes the heavens smile at your own little perfection.

So why do we find our own methods so darn refreshing?  Well because they are exactly what I said, they are our's and we prepare it the right way, right?

When someone else brews a batch of tea for me, I can always feel the relaxing feeling of the tea but I miss out on what the Taoists would consider the best part, the making of the tea.

Maybe it is something in the brain that tells us that what we are doing is right or maybe it is some energy or chi.  Whatever it may be, there is a force that tells us, as tea drinkers, that brewing our own is something that can never be bettered because our hands created this blend that we enjoy.

I like that feeling.  I hope you do too.  It just makes life so much simpler when you can do it yourself and know that you made it just right.  Next time you make tea, just think about the feeling that you have at that moment and don't forget to thank whatever force has made it possible for you to feel that way.

Turkey Day Purge

The Green Smoothie

Every day, I'm thankful I have food to fill my stomach and my stomach was especially full over the Thanksgiving holiday. As with most of my holiday meals, there was nothing fat free about it. There was nothing even low fat about it."One-third less fat cream cheese?” I asked my sister while we shopped at Safeway. We needed cream cheese for our carrot cake frosting. She looked at me like I had grown another head. Chuckling, I put the package back on the shelf and grabbed the full fat one next to it.

After three days of feasting – family dinner on Thanksgiving day, leftovers on Friday, another Thanksgiving dinner with friends Saturday – my body needed a break; a break from all that protein, all the refined sugar, all the carbohydrates. I needed a cleanse.

I remembered a drink a friend of mine made with her ultra fancy can-grind-anything blender. Ironically, she made the drink while she was visiting me last Thanksgiving. That month, she was on a health kick and purchased the blender just to make healthy smoothies. She brought the blender over to show me how to make some of her concoctions and the one I remembered was one she simply called her green smoothie. You'll see why from the ingredients.

Spinach, parsley, granny smith apple, bartlett pear, lemon, ginger.

Then she started throwing everything into the blender. I mean everything. Spinach. Apple with stem, seeds and core. Ginger and lemon with peel still on. Extra fiber apparently. When she handed me the grass...I mean glass, I hesitated, just for an instant.

It was delicious and refreshing.

I felt like my insides were being scrubbed, the thick liquid sweet and tart at the same time; my breath, oh so fresh from the parsley.

And it was fat free. It was just what I wanted and needed after some serious gorging and that's what I made myself the Sunday after Thanksgiving. It was my breakfast and lunch.

The Green Smoothie

Ingredients:

2 cups pre-washed spinach

A few sprigs of parsley

1 granny smith apple

1 bartlett pear

Juice of half a lemon

1 inch of ginger

Ice cubes

Directions:

Throw everything into a blender. I recommend removing core from apple and pear and removing the skin from the ginger unless you have a blender that can grind those things up. And I would keep these ingredients handy for after Christmas. And New Years.

Pages