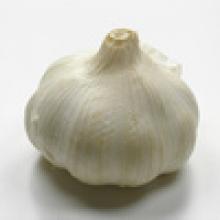
The Garlic Press: Good or Evil?

I will state up front that I am an avowed garlic press user.  I have taken flack for this before, usually from the same person who overthinks everything right into the ground.  The kind of person who can define the difference between "purified water" and "distilled water," and can give you at least three use cases for one and not the other.

And yet I, like Guardian food blogger Felicity Cloake, have often wondered if I was on the wrong side of the debate all along.  

Fundamentally the problem for me is that my knife skills are sloppy, and my patience is lacking.  And I use a lot of garlic! If I have to process five cloves of garlic, I can do it in a garlic press in a tenth the time it would take me to mince them by hand.

(Let us not even discuss the pre-minced garlic that comes in a glass jar.  It is a disgusting abomination, and I won't have it in my house.)

Cloake did some research and provides quotes from experts on the issue.  Frankly, a lot of it sounds like your typical woo-woo kitchen bull**** pseudoscience.  Many of them claim that using a garlic press spoils the taste.  I am skeptical of any claim like this, considering how easy it is to fool the tastebuds of supposed wine connoisseurs.  

One of the quotes had an interesting point, which is that crushing it releases the juice more than mincing does.  Apparently a lot of people do this on purpose, and throw away the juice, thinking that it will make the garlic more mild.  I had noticed that more juice comes out when you use a press, so I am careful to always press the garlic over the pot.  I like garlic a lot, and I don't want to lose the juice!  But for people who are pressing the garlic as a separate step, I agree that you don't want to lose that delicious garlic juice.

Mad props to Cloake for taking the time and having the intellectual curiosity (and rigor) to actually run some tests on this.  She first sat down and practiced her knife techniques, which is definitely something that I should do anyway.  (Meh.)  

She then ran through a series of recipes, making one version with crushed garlic, and one with minced.  I note that she used an interesting technique for the minced garlic, "adding coarse salt as an abrasive and squishing it all with the blade to give a puréed effect."  I will definitely have to try this, because her side by side photograph of crushed vs minced garlic looks just lovely!

Her results in general were that crushed garlic had a stronger garlicky flavor.  Which frankly I take as a recommendation for the press!  She concluded that the press is better when you specifically need the juice from the garlic (as in salad dressing) or if you really want a harsher flavor.  But she also confirms that the press is more wasteful, noting that "presses are more wasteful than I'd imagined - there was always noticeably less in the pressed pile."

I guess it's time for me to practice mincing garlic!


Creative Commons-licensed image courtesy of Flickr user funadium

REAL Ramen!

The New York Times has a mouthwatering Frugal Traveler article about "Tokyo's sprawling ramen ecosystem."  Although we here in the States are used to ramen as a ridiculously cheap, dried foodstuff, ramen is serious business in Japan.  As Frugal Traveler Matt Gross says, Tokyo's ramen stands and restaurants serve ramen where "everything is fresh, handmade and artisanal."

I learned a lot about ramen and Tokyo from this article.  (Among other things, I learned not to read articles about "real" ramen at lunchtime.  I finally broke down and fixed up a packet of Top Ramen, but it just wasn't the same.)  Many ramen shops specialize in just one kind of ramen.  For example, one restaurant specializes in green curry ramen, another in tonkotsu (a milky pork broth).

The ramen experience varies greatly, from literal holes in the wall to high end chef showcase restaurants.  At most middle of the road ramen shops, you buy a ticket at a vending machine and exchange that for your meal, which you eat at the stainless steel counter.

One of the more unexpected facts: ramen has a "stereotypically masculine image," even spawning a book aimed at women who want more feminine (or less resolutely masculine) ramen shops.  I can't think of an American equivalent, although barbecue probably comes close.

Some Japanese think of ramen as a food that connects them to their roots.  Japanese hipsters eat it because knowing which ramen shop is hot is a badge of cool.

If like me you live a little ways away from a ramen specialty restaurant, and want to make your own, ramen has three parts: the noodles, the broth, and the add-ins.  There is a bewildering variety available in all three (thus the proliferation of ramen restaurants and specialties in Tokyo).  

Although the noodle used in Japanese ramen is called "ramen noodles," I have not had any luck finding these here in the States.  You can buy a packet of instant ramen and just use those noodles, of course.  But for something a little more appetizing, use a package of udon noodles.  Udon noodles are widely available in most parts of the country - my local Safeway even carries them.

The soup broth is usually based on chicken or pork, along with something else as a flavoring.  A carton of chicken broth will work well as a starting point.  (I prefer Swanson's organic homestyle chicken broth for this kind of thing.  It costs more, but tastes less institutional compared to their "regular" chicken broth.)

The most common flavorings added to broth are seaweed flakes, dried bonito flakes, sardines, mushroom, or onions.  Typically you would choose one from that list, and use a light touch!  Next, add a dash of miso or soy sauce to give the broth that full flavor.

As for toppings, use whatever is freshest and close to hand.  Traditional toppings include slivers of fresh carrot, thin slices of meat, cubes of tofu, cooked shrimp, finely sliced fresh spinach, bean sprouts, thin slices of scallions or green onions.  You can build from there, adding just about anything that strikes your fancy!

Creative Commons-licensed photo courtesy of Flickr user lets-jam

10 Ways to Eat Cherries

When I was growing up, we had a cherry tree in our backyard. What cherries the birds and other wildlife didn’t get to we would consume with gusto, eating so many tart round rubies that we would get sick to our stomachs. Ah, those were the days!

Cherries are known for quite a few health benefits. They have been shown to lower cholesterol and triglycerides, reduce inflammation, arthritis, and pain, and help stop weight gain. It is said that eating 20 cherries a day can ward off inflammation altogether. They also contain lots of antioxidants, good for preserving cells against damage from free radicals or cancer.

Red cherries have melatonin in them, which helps fight disease-causing agents. A good source of Vitamin C and fiber, cherries are a low-fat, low-cholesterol, low-sodium food, making them a great healthy snack and dieter’s friend. Just remember that the darker the cherry, the more nutrients and health benefits it has—and sour cherries have more health benefits than sweet ones.

To celebrate National Cherry Month, here are a few ideas.

Give chocolate-covered cherries for Valentine’s Day.

Have a true cherry Coke—with real cherries!

Eat a cherry breakfast. Many breakfast bars and cereals contain cherries, as do some flavors of yogurt. If nothing else, blend the cherries in with your morning protein shake or yogurt.

Reach for a bag of frozen cherries instead of candy. They’ll be sweet enough to satisfy your sweet tooth without adding too many calories, and with the added benefit of nutrients and antioxidants.

Toss some cherries in your cereal, oatmeal, or ice cream.

Freeze cherries in ice cubes for a cute and yummy way to dress up Valentine’s drinks.

Remember asking, “Please, please, please, with a cherry on top?” Top everything with a cherry this month, from chocolate shakes to Valentine’s cupcakes.

Eat some dried cherries for a healthy snack. Mix them up with trail mix or Chex mix to jazz up snacks at your Super Bowl party.

Cook with cherries. From cherry pie to homemade punch, cherry cake to fruit salad, jams to compotes to soufflés, sweet or tart cherries can add some zest to any dish. Click here for some great recipes.

Make a cherry drink. Add cherries to your favorite berry cocktail; they’ll pretty much go with anything containing grenadine as well. Toss cherries in a wine or seltzer spritzer for a refreshing drink.

Try different varieties. If you don’t like the tart varieties (Morello and Montmorency cherries), try something sweet, like Bing, Royal Ann, Rainier, or Lambert cherries.

Perfect Pancakes

I've written about the basic American pancake

here. I've even linked to an easy and clearly presented step-by-step recipe by Ree Drummond, for Perfect Pancakes. In all seriousness, listen to The Pioneer Woman. Ree's recipe and procedure works. It's a case of someone who has a thoroughly tested and completely proven recipe and procedure. Don't mess with it. It works. But there are some other things, besides following a really great recipe, that you can do to have perfect pancakes.
  • Don't make the batter before you're about to cook it. Go ahead and mix the dry ingredients, but wait to add the wet ingredients. The chemical reactions that cause leavening will stop working if you wait too long between mixing the batter, and cooking. Ten minutes after mixing and before you start cooking the pancakes is about right.
  • Don't overmix. Really. You want to have the dry ingredients mixed with the wet ingredients but not, as Ree Drummond puts it, "beaten to death." It's ok to have a few lumps; you want to moisten all the dry ingredients, and disperse the liquids evenly. Doing more than that results in tough, chewy pancakes.
  • You want a cooking surface, whether it's skillet or an actual griddle, that's flat and that heats evenly. That means thicker is better than thinner, since you can turn down the heat and still cook using residual heat.
  • Watch the temperature. The danger is less one of over cooking, or burning, than one of not having the cooking surface hot enough. Test the griddle or pan by sprinkling hot water on it; if it's hot enough, the water drops will skitter and dance across the surface of the griddle.
  • Don't use butter to oil your cooking surface; it doesn't do well with high heat, and can cause odd blotches on the pancakes. Use canola oil, or bacon fat (I know, I know--just wipe out the pan with a paper towel so that there's a little there, and re-apply using the paper towel), or even canola oil Pam.
  • Pancake size dramatically affects cooking time. Smaller is easier to control than large. I like to use about 1/4 cup of batter in a measuring cup; just dip it in the batter, and gently pour it on the pre-heated cooking surface. If pancake appearance is more important than haste, a large bottle with a squeezable pour spout, like a large bottle that once held salad dressing or ketchup, that you've cleaned and filled with pancake batter, gives you amazing control over the size and shape of your pancakes.
  • When bubbles start to form in the pancake, not just one or two but several, and the edges are a little brown, gently flip the pancakes and cook the other side. The second side will cook much more quickly; don't be fooled into over-cooking them.
  • Don't use corn-syrup based fake maple syrup. The real stuff is much more affordable if you buy the better-tasting but darker grades, like B Amber and B B Dark Amber. Alternatively, just a little butter, or fruit preserves, or marmalade, or a bit of powdered sugar and fresh lemon juice all work really well.

Your Oscar Party: The Food

Ahh, the Oscars. What better excuse for a mid-winter party is there? You can dress up—either as your favorite nominated character or just in something formal and sexy—and spend the night wining and dining like a star. But where to begin?

Your Academy Award-winning menu should begin with some beverages to fit the evening. Sparkling wine or cider are good choices, as well as champagne; having a swanky drink on hand, like a delicious cosmopolitan, would also help set the mood.

Here’s a basic cosmo recipe: In a martini shaker, shake together 4 parts vodka, 2 parts cranberry juice, 2 parts triple sec, and 1 part fresh lime juice. Pour into a martini glass and serve with a lime wedge or curl for a sophisticated touch.

Be sure to have nonalcoholic beverages available for your guests, such as soft drinks, chilled grape juice, sparkling water, or anything else you think would be appropriate. You may also want to have some nonalcoholic mixed drinks available, such as a Shirley Temple, if you have any underage guests coming to your party.

Next, you’ll want to have something fresh to nibble. While chips and dips are fine, you can definitely dress up the evening with more than your little black dress. Fruit and cheese platters are classy and delicious; serve a yogurt fruit dip along with your platters for that popular fondue factor. Ready-made trays of meats, cheeses, vegetables, or brie are also often available at your local supermarket. Though slightly more costly than making your own, they can save you time if you’re in a pinch.

Though you don’t have to make your Oscar party into a dinner party, if you do provide food you may want to serve it buffet-style for easy access during the awards show. Heated trays of pasta and vegetables work well for this.

Finally, think about serving your guests something sweet to top off the evening with. A chocolate drink would be appropriate, as would cheesecake drizzled with your favorite fruit sauce. A small chocolate fondue pot surrounded by small bits of cheesecake, fruit, and other treats would also surely go over well. Just be careful—not only will you have to watch the heat, you’ll also have to keep an eye on the supply as it quickly dwindles away!

Planning on hosting a stellar Oscars shindig? Post your recipe ideas, cocktail concoctions, and other culinary creations here.

Starting Your Sourdough Starter

This week an internet friend sent me some flakes of sourdough starter, so that I could start my own from his culture.  You can of course generate your own starter just using flour, water, and patience.  But getting a bit of starter from someone else is the best way to give yourself a good head start.

There is a lot of mythology, rumor, old wive's tales, and urban (rural?) legend surrounding the sourdough starter.  The first and most important thing to remember is that people have been using sourdough starters for thousands of years.  The first sourdoughs were probably started in ancient Egypt, around 1,500 years before the birth of Christ.

Sourdough starters are a lot more robust than you might think, given the exacting instructions and debates over minutia you can find online.  Sourdough starter is a culture of yeast and lactobacillus, swimming in and eating a media of flour and water.  The lactobacillus turns its environment acidic (thus the sourness) which keeps hostile bacteria from gaining a foothold.  Luckily, bread yeast can survive the acidic environment.  The lactobacillus lends its distinctive taste to the mix, and keeps the culture clean.

The starter culture will eat the flour you give it, create CO2, and replicate.  Your job is basically to make sure it doesn't run out of food.  An active, mature starter (I have heard that a starter isn't considered mature and ready until it's been going for a month) should be able to double its volume within four or five hours at room temperature after a feeding.  Its activity is dependent on the temperature, which is why that same process will take a week or two if you stick your starter in the fridge.

When you're beginning your starter, either from scratch or from a sample from a friend, there are two phases.  In Phase 1, you want to feed it (throw away half the starter, then add about 1/2 C of water and ½ C of water) once or twice a day, depending on the temperature.  I keep a cold house, and it's January, so I fed mine once a day.  If you live in a hot part of the country, and it's July, you'd want to feed your starter more often.

Phase 1 lasts for a few days to a week, or until the starter begins to really get moving.  In other words, at first, you should feed your starter whether it needs it or not.  

Phase 2 begins when your starter's activity starts ramping up to typical levels.  You will know you have hit phase 2 when your starter doubles its size after a feeding.  In Phase 2, leave your starter at room temperature, and feed it once a day.  This allows the culture to mature, and the proportion of bacteria and yeast to find a balance.  Phase 2 should last for at least two weeks, from what I have read.

You can make bread from the discarded Phase 2 starter, but be prepared for the results to be erratic.  Because a baby starter isn't ready yet, it can really affect the taste, rising time, and texture of the finished bread.

Once your starter has matured, congratulations!  You made it!  You can now safely keep your starter in the fridge, and follow regular sourdough protocols for baking bread.  More on those in a future article!

Pancakes

Pancakes in the broadest terms—an

almost flat cake cooked on a grill, griddle, or pan—are not only one of the earliest forms of bread, since they can be easily cooked on heated rocks, but also, one of the most enduring, popular and diverse breads since just about every linguistic or cultural group has some form of pancake. The pancake is breakfast, dinner and dessert. It's possible to make them with flour made from just about every kind of grain and nut, leavened or unleavened, topped or naked. They tend to be fairly simple to make as well, though the more delicate forms, like mu shu, blini, and crêpes, can take a bit of practice. The earliest actual recipe I've been able to find is from the seventeenth century, but there are lots of references to various sorts of pancakes going all the way back to ancient Greek kitchens. There's even a fun history of the pancake from the University of Chicago Press by Ken Albala titled Pancake: A Global History.

Pancakes were one of the first things I learned to cook, right after scrambled eggs. My father made them most of the time, unless we had company. He used the recipe from this cookbook. My mom made pecan pancakes sometimes, with South Carolina pecans, and New Hampshire Grade B maple syrup. One of the first things I learned about making really good pancakes was that you needed a quality pan, or griddle, and it needed to be at the right temperature. My father, when I was quite small, would let me "test" the heated griddle by sprinkling a couple of drops of water on it. If the water sizzled and danced across the surface of the griddle, it was hot enough. I favor cast iron for cooking pancakes, a well-seasoned but very clean cast iron pan. You want a thin coat of oil on the pan, but I'm not a fan of butter for cooking pancakes; it doesn't deal well with heat. One school favors cooking bacon, setting it aside to drain, and wiping down the pan with paper towels. But there are those who use a thin spray of Pam, or even a little bit of Crisco and a paper towel to make sure it's evenly spread, and not too oily, too.

Right now, my favorite recipe is this one from the Pioneer Woman; Ree Drummond's Perfect Pancakes. Now, I know, I really do, that you can make tasty pancakes from Bisquick or Aunt Jemima boxed mixes. I just don't see any point in it. If I cooked pancakes for a family, or on a regular basis, I'd make my own dry ingredients mix, but honestly, pancakes from scratch takes about ten minutes, and they really are better.

Candy Fight: Nerds Vs Runts

One of the great philosophical divides among candy connoisseurs is the split between those who like Nerds, versus those who prefer Runts.  Oddly enough, in my experience there is no point trying to get Nerds lovers to like Runts, or vice versa.  In the interests of fostering an open dialogue, I will state for the record that I prefer Nerds.

The funny thing about the schism is that Nerds and Runts are pretty much the exact same candy, but in a different size and shape.  This is actually true of most of the Willy Wonka candy line, but nowhere is the similarity as remarkable as with Nerds and Runts.

Nerds are tiny and irregularly shaped, little nuggets like miniature asteroids.  Whereas Runts, their showier cousin, are purportedly shaped like the fruit their taste is meant to resemble.  The banana is a reasonably accurate resemblance, I will give you that.  The orange and green apple are both simply spherical - fair enough.  But the strawberry Runts are shaped like hearts.  No matter how hard I try, I cannot see them as being strawberry shaped.

(Random fact: according to Wikipedia, the same person was responsible for the creation of both candies.  Angelo Fraggos, Brand Manager for the Willy Wonka Candy Company, created Nerds in 1983 and Runts in 1985.)

Nerds come in a far wider spectrum of flavors than Runts, probably partly because the Nerds product line can be experimented with much more easily.  They don't have to create an entirely different shape each time!  The classic presentation of Nerds is in a box with two compartments, with two separate flavors, one in each compartment.  I remember that part of the fun was in picking which flavor you wanted, and sometimes you had to hit several stores before you found the right combination.

When I purchased a box of Nerds recently on my nostalgia candy kick, it was "Rainbow Nerds."  This is a larger box, with a bunch of different Nerds flavors all mixed together.  I have to admit, I didn't like it as much.  It had the same problem as eating a handful of Jelly Bellys - if you eat a mouthful of mixed Nerds flavors, all you taste is "sweet."  The flavors, such as they are, all blend together in the mouth.

Wikipedia also reminds me that the 1980s were the decade of Nerds superiority, and also included a limited release of Nerds Cereal.  Which I remember trying.  It was fairly awful.  Like Froot Loops, but sweeter.  My teeth ache to think of it.

Runts, meanwhile, were never my favorite.  Due largely to the presence of the banana Runt, which was a jarring departure from the rest of the Runts in both flavor and form factor.  The banana Runts are a lot harder to the tooth than the others, and I'm always mildly concerned that a shard of banana Runt will break off and stab me in the gumline.  I also don't care for banana flavored things as a rule.

The other flavors of Runt, I have decided, are fairly innocuous.   They have a nice crunch to them, and if Willy Wonka ever puts out a banana-free variety of Runts, I'll be first in line.  Until then?  I'm sticking to my Nerds.

Creative Commons-licensed image courtesy of Flickr user Special

Pages